Feeding excel values to macros and arrays
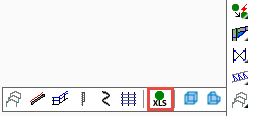
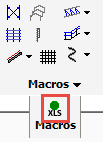
Command : PrB_FeedExcelToMacros
This command can be used to feed cell values from an excel file directly into macros and arrays in a Parabuild drawing.
A mapping file can be used to reduce the need for having to repetitively enter names, but the mapping file is not a requirement.
You can download and use this sample template and accompanying excel files to test out this command :
- Template drawing of a portal frame with cladding sheets
- The excel feeder file that was created to feed values the portal frame template
- The excel mapping file that was created to map the values to the macros and arrays in the portal frame template
To use these 3 files, first open the dwg file in Parabuild, and then start the excel feeder command.
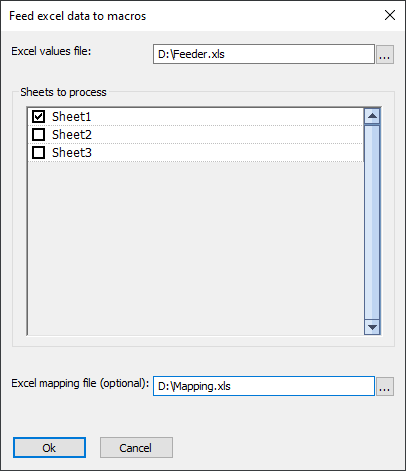
Then enter the locations of the feeder and mapping files.
When pressing Ok, the excel files will be read and the changes will be applied to the macros and arrays in the drawing.
The template drawing looks like this before and after applying excel values to it :
|
|
The template drawing before applying the excel values |
The template drawing after applying the excel values |
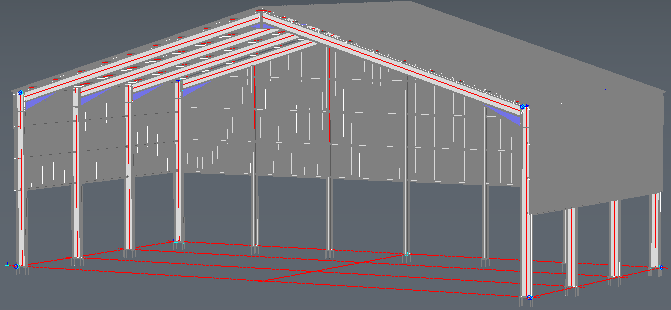
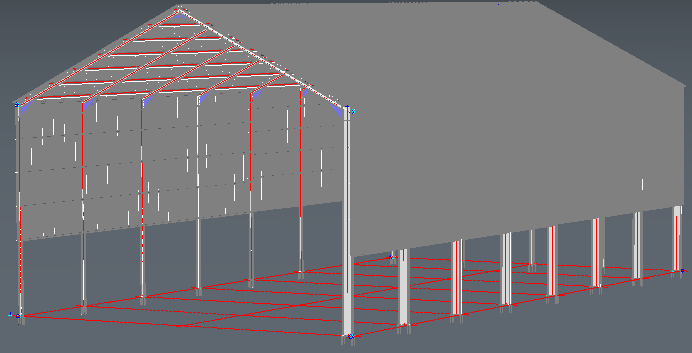
In this example the excel file(s) changed the roof height, enlarged the structure, changed the number of portal frames, modified the side rails and did changes to the apex and haunch connections.
To explain the workings of this command, consider the following simple example mapping and feeding files :
Sample mapping file
Unique name |
Macro/array name or groupname |
Module name or groupname |
Variable name |
Pre-Filter |
Number of portals |
PortalFrameArray |
(none) |
NumEntries |
|
Apex height |
PortalMacro |
ModelLines |
ApexHeight |
|
Portal1 Column section |
PortalMacro |
ProfilesModule |
Column.SectionName |
PortalFrameArray.0 |
Sample feeding file
Unique name |
Value |
Number of portals |
8 |
Apex height |
15000 |
Portal1 Column section |
IPE220 |
The above sample files would do the following changes on a drawing that contains the correctly named array and macros :
- Change the number of portal frames to 8
- Change the apex height to 15000
- Change the section of the column of only the first portal frame to IPE220
The columns that reference the Parabuild macros and arrays are Macro/array name or groupname, Module name or groupname and Variable name.
Macro/array name or groupname
The Macro/array name or groupname column references the name or groupname of the macro in which a variable needs to be changed.
Module name or groupname
The Module name or groupname column references the name or groupname of the module in which a variable needs to be changed
Variable name
The Variable name column references the name of the variable itself.
Pre-Filter
The Pre-Filter column allows you to add a filter to which the value will be applied. This can be particularly useful for arrays, where we can configure this to only apply the value to a particular index in the array.
The supported strings are :
- Defining macro name. Ex: "DefiningMacro"
- Defining array (with optional entry). Ex: "PortalArray.Last", "PortalArray.3"
You can combine multiple strings by using a comma separated list. Ex: "PortalArray.Last, RoofPurlins.First"
When this is used in a full path variable with redirection included, then put it between <>
For example :
- "<DefiningMacro>MacroName.ModuleName.VariableName"
- "<PortalArray.Last>MacroName.ModuleName.VariableName"
- "<PortalArray.Last, RoofPurlins.First>MacroName.ModuleName.VariableName"
Unique name
The unique name columns is there to assign a name to the row's configuration. This unique name can then be used in the feeding file to reference the macro/array/variable without having to mention all of the information again.
Using a single excel file to feed excel values
Alternatively, we can use a single excel file that directly feeds values to the macros.
The mapping file can be left out if the Unique name column contains all of the necessary information to target the macro, module and variable.
This is achieved by adding a '.' separator in the Unique name column
This is an example of such a single feeding excel file :
Unique name |
Value |
Staircase.Staircase.NumEntries |
5 |
Staircase.Staircase.RigidEntryDistance |
5000 |
Staircase.Staircase.2.EntryDimFixedByUser |
1 |
Staircase.Staircase.2.UserEntrySize |
3000 |
Staircase.Columns.ColumnsDistanceFromSide1 |
-500 |
Staircase.Floors.DistanceFromSide1 |
-500 |
Staircase.Floors.DistanceFromSide3 |
-500 |
Stringer.Stringer.Profiles.SectionName |
UPN220 |
In this example, a different height between floor 2 and 3 was deliberately chosen to show the flexibility of the array.
If you want to try out this excel file, then you will need these files :
- Download the excel feeder file for the staircase from here
- The template staircase itself can be found in the library folder : \Parabuild\Pb_Lib\Macros\Frames\Staircase Cranked Stringers.dwg
Alternatively, you can download the staircase template file from here
Variable types
For the variable name, a lot of different types are available.
These are all the different types that can be used :
Normal variables
Normal variables that reside inside modules can simply be changed by referencing their name.
General variables
A general variable of a macro is a variable that resides throughout the entire macro, and this across all modules of the macro.
These variables always start with "gen_" in their name.
You can simply use the general variable's name, but leave the modules field empty whenever you use a general variable.
The general variables of a macro can be consulted and modified in the General macro settings.
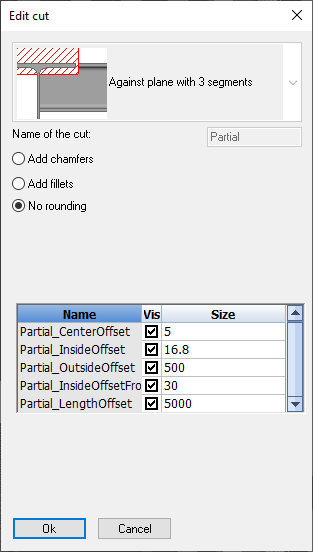
Cuts
Cuts can be located in any module.
Cuts can have several variables depending on the type of cut.
To reference a variable of a cut, enter the cut name and the variable name separated by an underscore.
To see the supported variables of a particular cut, you can open the cut in the edit macro dialog box.
The correct naming is already shown in the edit cut dialog :
Profiles
Most of the settings that are available in the Profile placement dialog, can also be changed through the Excel variables.
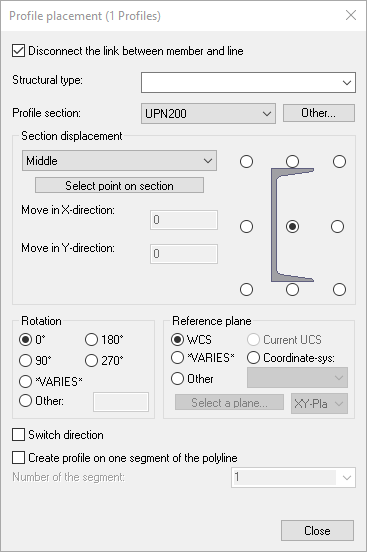
The variable names listed below are unique to profile placements in a profile module, and they can be used to feed variables :
- SectionName : See Profile section in the dialog
- RotationAngleRadians and RotationAngleDegrees : see Rotation in the dialog
- ReversePath : see Switch direction in the dialog
- SectionOffset : This value should be the x and y coordinates for the displacement of the section, delimited by a command. For example: 10,15
See Move in X-Direction and Move in Y-Direction in the dialog - SectionOffsetType : Changes the location of the cardinal point on the section. See Section displacement in the dialog
These are the supported numbers and what they do :
- 4 = Middle
- 5 = Neutral axis
- 6 = Above
- 7 = Under
- 8 = Left
- 9 = Right
- 10 = upleft
- 11 = upright
- 12 = downleft
- 13 = downright
- SectionOffsetTypeName : Changes the location of the cardinal point on the section. See Section displacement in the dialog
The supported names for offset type are :
- Startpoint of polyline
- Middle
- Neutral axis
- Above
- Under
- Left
- Right
- upleft
- upright
- downleft
- downright
Note : Change only one of the values SectionOffset/SectionOffsetType/SectionOffsetTypeName, because these 3 variables change the same setting.
These variables can be used directly for a profile module. All of the profiles that are defined in this module will then get the new setting.
You can also 'target' specific profiles in the module by specifying the groupname of the profile(s) first, like this :
Column1.SectionName
In this example Column1 is the groupname, and to find out the groupname of a profile, you can use the command PrB_GroupName.
Bolt module
Many of the settings that are available in the Advanced bolt settings dialog, can also be changed through the Excel variables.
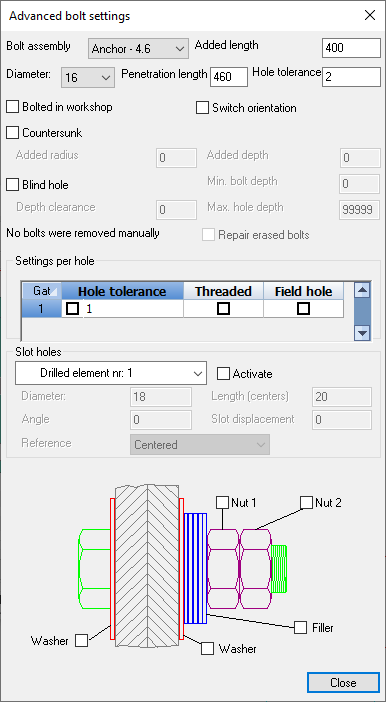
The following variable names can be used to feed variables that are unique to bolt modules :
- BoltAssembly - See Bolt assembly in the dialog
- BoltDiameter - See Diameter in the dialog
- BoltLength - This setting will change the bolt length temporarily, but the bolt length will immediatly be corrected again by the check new holes tool. This variables is therefore only useful to try to extend the bolt to be connected to more parts that are located on the side of the nut
- BoltAddedLength - See Added length in the dialog. Another name for this is protrusion. This will force the bolt to add more length to the bolt after the last nut
- ShopBolted - See Shop bolted in the dialog
- HoleOffset - This is the radius based offset between bolt and hole
- HoleTolerance - See Hole tolerance in the dialog. This is the diameter based tolerance between bolt and hole
- HoleDiameter - This changes the hole diameter directly, instead of through the tolerance. The hole tolerance is simply calculated and changed based on the value that you enter here
Note : Change only one of the values HoleOffset/HoleTolerance/HoleDiameter, because these 3 variables change the same setting
Bolt Pattern
Many of the settings that are available in the Bolt pattern settings dialog, can also be changed through the Excel variables.
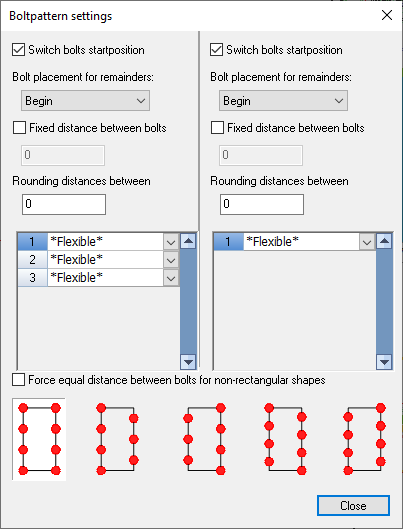
The following variable names can be used to feed pattern objects :
- ReversePositions1 - This value refers to the Switch bolts startposition setting in the dialog
- ReversePositions2 - Same as ReversePositions1 but it refers to the right side of the dialog
- IsFixedEntryDistance1 - Enable this to set a fixed distance between all the bolts. Refers to the Fixed distance between bolts checkbox in the dialog
- IsFixedEntryDistance2 - Same as IsFixedEntryDistance1 but it refers to the right side of the dialog
- UserEntryDist1 - Use this in combination with IsFixedEntryDistance1 to set a fixed distance between all the bolts
- UserEntryDist2 - Same as UserEntryDist1 but it refers to the right side of the dialog
- EntryDistRounding1 - This value refers to the Rounding distance between setting in the dialog
- EntryDistRounding2 - Same as EntryDistRounding1 but it refers to the right side of the dialog
- Count1 - Changes the number of bolts that are distributed evenly. This value changes the number of rows in the dialog
- Count2 - Same as Count1 but it refers to the right side of the dialog
- OffsetsAsList1 - Use this to set varying distances between the bolts. Enter all of the distances separated by a comma. For example : 100,150,100
- OffsetsAsList2 - Same as OffsetsAsList1
The left side of the dialog refers to the variables names 1, the right of the dialog refers to the variable names with 2.
Note : Change only one of the values Count1/OffsetsAsList1, because these 2 variables change the same setting.
Array
Many of the settings that are available in the Array settings dialog, can also be changed through the Excel variables.
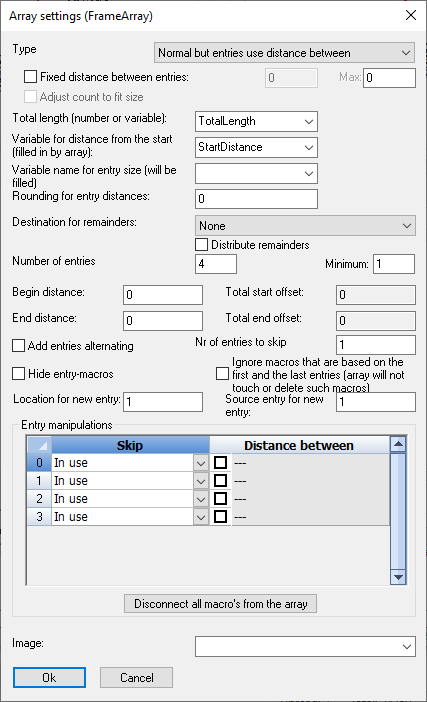
To reference an array, use the array name and/or array group name in the excel columns. You can find these strings in the properties panel of the array object.
The following variable names can be used to feed array objects :
- Type - This changes the type of array, see the Type setting in the dialog. Enter a number from 1 to 3 here :
- 1 : Normal distribution
- 2 : Normal but entries use distance between
- 3 : Entries decide distance between
- EnableRigidEntryDists - Refers to the Fixed distance between entries setting in the dialog. Only use 1 or 0 as value in excel to change the checkbox value
- RigidEntryDistFromEntryMacro - Refers to the Distance is retrieved from entry macro setting in the dialog. Only use 1 or 0 as value in excel to change the checkbox value. This value only works when EnableRigidEntryDists is enabled
- RigidEntryDistance - Refers to the distance between entries: setting in the dialog
- RigidEntryDistanceMax - Refers to the distance between entries Max: setting in the dialog
- AdjustCountToFitSize - Refers to the Adjust count to fit size setting in the dialog
- TotalDimName - Refers to the Total length (number or variable) setting in the dialog
- EntryDimName - Refers to the Variable for distance from the start setting in the dialog
- EntrySizeDimName - Refers to the Variable name for entry size (will be filled) setting in the dialog
- EntryDistRounding - Refers to the Rounding for entry distances setting in the dialog
- RemainderDestination - Refers to the Destination for remainders setting in the dialog. Enter one of the valid numbers here :
- 0 : None
- 1 : Start - Remainder goes before the first entry
- 2 : End - Remainder goes after the last entry
- 4 : Both ends - Remainder goes half before the first entry, half after the last entry (= centered)
- 8 : Distribute - All entries without a UserEntrySize get a share of the remainder. Limited by "mEntryDistRounding"
- NumEntries - Refers to the Number of entries setting in the dialog
- MinNumEntries - Refers to the Number of entries minimum setting in the dialog
- AppendByAlternating - Refers to the Add entries alternating setting in the dialog. Only use 1 or 0 as value in excel to change the checkbox value
- AlternatingSourceOffset - Refers to the Nr of entries to skip setting in the dialog
- UserStartOffset - Refers to the Begin distance setting in the dialog
- UserEndOffset - Refers to the End distance setting in the dialog
- DefaultInsertIndex - Refers to the Location for new entry setting in the dialog
- DefaultSourceIndex - Refers to the Source entry for new entry setting in the dialog
- SkipEntry - Refers to the Entry manipulations listbox in the dialog. Setting this to 1 will skip the entry, setting this to 0 will restore the entry
This name gives the ability to skip (remove) a certain entry in the array.
The variable name needs to include the entry index number.
Some valid examples of variable names are :
- 1.SkipEntry - Skip the second entry
- -1.SkipEntry - Skip the second from last entry
- First.SkipEntry - Skip the first entry
- Last.SkipEntry - Skip the last entry
- EntryDimFixedByUser - Refers to the Entry manipulations listbox in the dialog. Setting this to 1 will enable the distance between entries override, setting this to 0 will disable the distance override
The variable name needs to include the entry index number.
Some valid examples of variable names are :
- 1.EntryDimFixedByUser - Enable distance override between the second and third entries
- -1.EntryDimFixedByUser - Enable distance override between the second from last and third from last entries
- First.EntryDimFixedByUser - Enable distance override between the first and the second entries
- Last.EntryDimFixedByUser - Enable distance override between the last and the second from last entries
- UserEntrySize - Refers to the Entry manipulations listbox in the dialog. This will set the distance between entries override 2 particular entries. This needs to be used in combination with the EntryDimFixedByUser variable (enable this option first)
The variable name needs to include the entry index number.
Some valid examples of variable names are :
- 1.UserEntrySize - Sets the distance override between the second and third entries
- -1.UserEntrySize - Sets the distance override between the second from last and third from last entries
- First.UserEntrySize - Sets the distance override between the first and the second entries
- Last.UserEntrySize - Sets the distance override between the last and the second from last entries