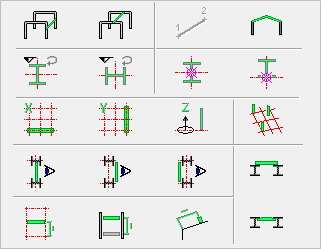
Context Buttons
More about the context buttons (restrictions)
When you press one of the action buttons, then you will see the available options for that action underneath.
If you press one of these context buttons, then you put a restriction on Parabuild.
This is sometimes very useful, because in some situations, there are many different possible solutions for Parabuild to consider. Parabuild can not always show all the possible solutions at once. In that case the context buttons offer a solution. For example, if you want to draw a beam, you can press one or both beam buttons. Then Parabuild will not propose to draw a column or rafters.
Note, that when selecting one of the context buttons, ensure all other buttons are deactivated unless you explicitly want the extra filter to be active.
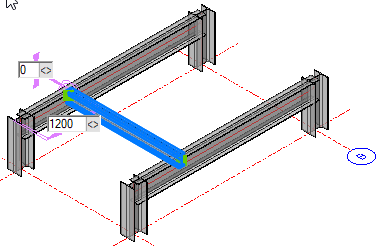
 Draw beams between columns
Move the mouse pointer between the columns to which the beam is to be connected - the selected beam will be automatically drawn showing the reference elevation.
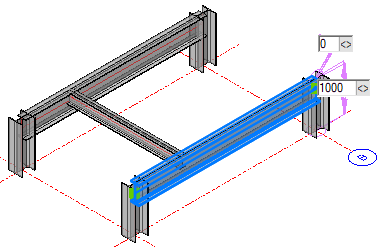
 Draw beams between beams
Move the mouse pointer between the beams to which the beam is to be connected - the selected beam will be automatically drawn showing the reference dimension from the closest grid line. When satisfied with the position, click the right mouse button or press <Enter>
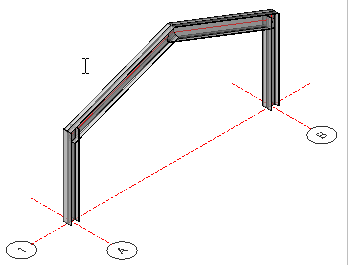
 Draw a Pitched Rafter
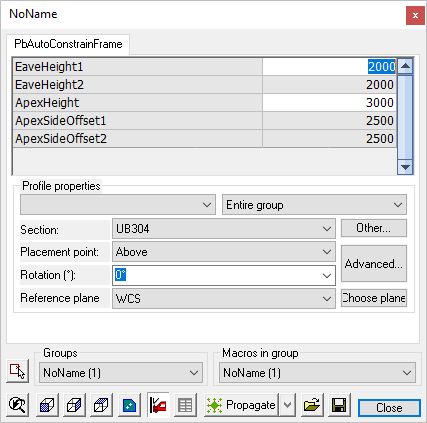
Activate the Pitched rafter button (Ensuring all other Context buttons are deactivated) and select the rafter profile - press the Draw framing button and move the mouse cursor between the two columns.
The eaves height of the rafter is usually established at the top level of the column - the apex height is set according to the chosen levels.
Left click the mouse to draw the rafter in the current position.
The dimensions may be edited at the time of setting the rafter in position by editing the reference dimension - Alternatively you can double click one of the rafter legs to open the Edit dialog.
|
|
 Parallel to World Y - A column's orientation may be adjusted by the user by moving the cursor over either the X or Y axis of the grid line. This command will maintain the orientation to the Y axis - this is particularly useful when placing multiple columns.
 Parallel to World X - As above, but maintaining the X axis.
 Grip on member axis - This will maintain the grip on the geometric center of the member.
 Grip on member side - This will maintain the grip on the outside face of the flange.
 Parallel WCS X Axis - Will draw a beam between members while maintaining the X Axis
 Parallel WCS Y Axis - Will draw a beam between members while maintaining the Y Axis
 Parallel WCS Z Axis - This button effectively forces Parabuild to only draw columns
 Draw member based on Grid - Will force Parabuild to draw columns based on the grids only.
 Centered on Section - Will draw a member in line with the centers of 2 other members
 Near-side of Section - Will draw a member against the near-side flanges of 2 other members
 Far-side of Section - Will draw a beam against the far-side flanges of 2 other members
 New beam above beams - Will draw a beam sitting on the top flanges of existing beams
 New beam aligned with top of beams beams - Will draw a beam in line with the top flanges of existing beams
 Length offset from grid - Will force Parabuild to draw horizontal members based on the grids only. This effectively disables the Offset from parallel obligation :
 ![]()
 Length offset from parallel - Will force Parabuild to draw horizontal members based on other members only. This effectively disables the Offset from grid obligation :
 ![]()
 Length offset by model line ends - Will force Parabuild to use model lines as reference point wherever it can (instead of the grid or other members).