Document generation Settings
Command - Prb_OutputSettings
The document generation settings (or output settings) dialog can be accessed from the Sheets Manager and there the Settings button :

Navigating the output settings dialog
The output settings dialog has 4 main tabs each of which will be explained below.

General
The general tab contains the common settings that may have an effect on all the generated documents.
This ranges from value accuracies to column names, formats, hatch patterns, layers, and dimension styles.
The settings on this tab are explained in detail in the General output settings.
Drawings
The drawings tab contains all of the settings for the shop drawings and GA drawings generation.
The settings on this tab are explained in detail in the Drawing settings.
CNC
The CNC tab contains the settings for the generation of all CNC files :
- Dxf files for plates
- Dstv for plates and/or profiles
- Step files for plates and/or profiles, and for assemblies
- Wraparounds for round pipes
The settings on this tab are explained in detail in the topic CNC files settings.
Bills
The Bills tab contains the settings for all the separately generated bills.
These are the bills generated in a separate excel, text, or PBS file.
To configure the smaller bill tables that are shown on sheets you should look at the Template settings topic instead.
The settings on this tab are explained in detail in the Bills of Material settings topic.
Add, remove, copy, and sort a setting
Most of the tabs on this dialog have the following actions next to the list of settings :
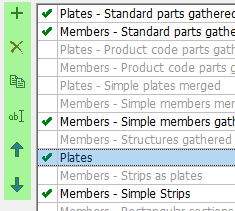
Each action's purpose is explained here :
 This will create a new item in the list
 This will erase the selected item. Take care not to erase too much because this can easily break the shop drawing generation or GA view commands. Use the reset button to restore all the settings to the out-of-the-box defaults.
 This will make a copy of the selected item. The new name of the new item will be asked. Items with the same name are not allowed.
 This will rename the selected item
 This will move the item one position up. For the detail groups and CNC groups the order of the items will have a big influence on which item in the list will eventually be chosen for the generation. For all other lists, the order of the items is only important for our own convenience of having a logic sequence.
 This will move the item one position down. For the detail groups and CNC groups the order of the items will have a big influence on which item in the list will eventually be chosen for the generation. For all other lists, the order of the items is only important for our own convenience of having a logic sequence.
Partly introducing out-of-the-box settings into your settings
After each Parabuild update the out-of-the-box default settings will be improved and expanded with the new capabilities.
But when you have already made changes to the settings and you saved those settings, then you will not have any the new default settings.
To resolve this, you can of course use the reset button  but this will remove all the changes that you have done in this dialog box.
We can however insert the out-of-the-box settings partly with the button on each tab : 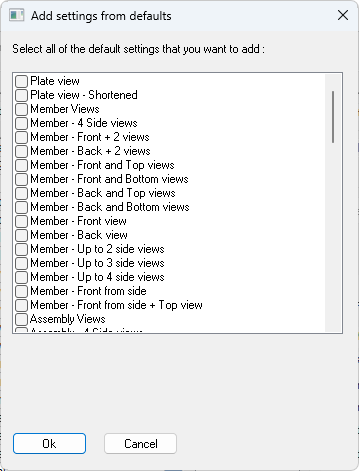
This will show a dialog that lists all of the out-of-the-box settings for the current tab.
You can choose to insert multiple settings here by activating the checkboxes in front of them.
When you press Ok the settings will be added to your existing settings.
The setting names need to be unique. If a setting with the same name already exists then you will be prompted for a name change.
Do note that the settings will have dependencies.
For example, the GA drawing settings will depend on View arrangements and on Sheet configuration.
Then in turn the View arrangements depend on the View appearances.
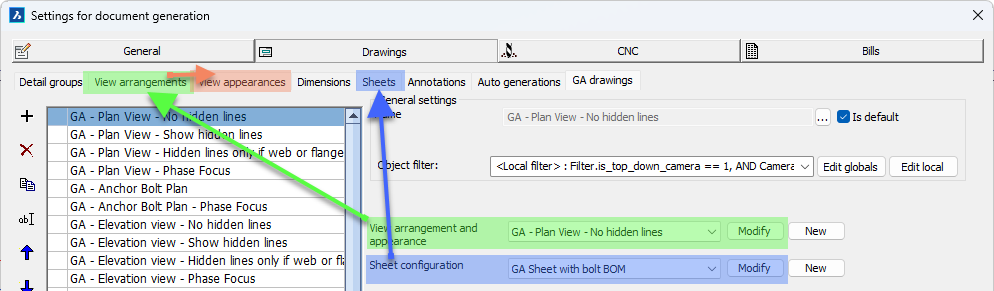
These dependencies are name-based.
So whenever you introduce new settings, you will have to consider introducing more default settings of the depending tabs.
And when you change the name of the default settings, then you have to change the name in the settings that depend on it, otherwise the settings may not be used at all.
Saving and loading all the settings
The bottom of this dialog has the following options to save or open previous configurations.
Each of these actions are explained in detail below :

This will remove all of the changes done in the current dialog, and revert all of the options to the default 'out of the box' settings. This will not erase settings that have been stored to file.
 With this button you can load a settings file that has been stored previously. All of the settings on this dialog box and their sub-dialogs are stored in this file.
These files are stored in the folder : \Parabuild\Pb_Lib\Workshop Drawings\Settings\
 With this button you can save all of the settings on this dialog box and their sub-dialogs into a file.
These files are stored in the folder : \Parabuild\Pb_Lib\Workshop Drawings\Settings\
 Use this button to store all of the current settings into the standards file.
The next time that Parabuild starts, it will load this file automatically.
This standards file is located here : \Parabuild\DefaultWorkshopSettings-English.dat
This filename may differ depending on the language and units that you are currently working in.
 Use this button to load all of the settings from the standards file.
This standards file is located here : \Parabuild\DefaultWorkshopSettings-English.dat
This filename may differ depending on the language and units that you are currently working in.